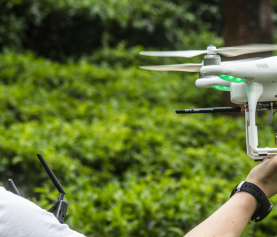
Tips for Entry-Level Drone Videography
Thinking about getting into drone videography or photography?
You are definitely not alone. 2015 is supposed to be the year of the drone, and the Consumer Electronics Association expects sales to pass the $100 million mark this year. Drone maker DJI is on pace to do $1 billion in sales this year alone.
Because there are so many drones out on the market, it may be hard to know what you’re looking for your first time out. We’re here to help you with some tips and advice for videographers and cinematographers looking to get started in the aerial videography field.
First off, when you’re looking at any drone, there are a couple features to look for to help you capture good aerial footage:
- Livestream footage to the pilot – also known as FPV (first person view). While you can plan really well and throw a drone up there to get a shot, having FPV will help you actually frame your footage.
- Image stabilization. Most of the new drones coming out have a 3-axis gimbal, so this tip may not be very relevant in the future – but make sure if you’re looking at an older model you find one that can stabilize on all 3 axes (pitch, yaw, roll).
- Camera. Definitely look at resolution on your drone’s built-in camera – or how much camera weight a drone can hold if you’re looking to attach your own GoPro or something similar. Another thing to think about with a camera is its ability to tilt and reframe the shot during flight.
- Application information available. Most drones have an accompanying iOS or Android app that allows you to use the FPV and gives you information about your flight. Not all apps are equal and each one has different information they share. At minimum, make sure you have one that shows flight height and battery life remaining.
- Battery life. For short flights over a single building or to catch a specific scene, a battery flight time of 7 or 8 minutes could be fine. But if you are working to frame a shot and testing different angles, you’ll probably want to look for a drone with a battery life at least in the teens, if not higher.
- Range. You’ll need to know what kind of footage you want to get and the range you’ll need to get it. A lot of drones are limited to 150 feet from the controller, others can go much, much farther.
- Portability. Whether you plan on hiking up into the back country or travel around the city for some urban aerial shots, you’ll want to make sure you can port your drone around relatively easily. Find one that lets you easily take the rotors off, without a wrench or other tools, so you don’t have to pack extra gear if you are taking it into the back country. Many drones have rotors that can spin right off.
Here are a couple additional tips we found helpful: get a cheap practice drone and learn how to fly and crash it well. Really. That way you’re not throwing away $1,200 your second time out (and it’s not an exaggeration. Our second time out with the Phantom a technical malfunction meant we nearly got it hit by two vans and came close to clipping the top of a bus … another tip, don’t fly the drone near a busy road your second time out). Spending $1,290 to get a nice drone and a practice drone is better than spending $1,200 on a nice drone and then $500 two weeks later on repairs.
It’s also important to know what the airspace laws are in your neck of the woods. For right now in the US, drones can legally go up to 400 feet without running afoul of the FAA suggestions. You also can’t fly a drone within 2 miles of the White House, within five miles of an airport without permission, or in national parks. Outside of those regulations, flying a drone for personal or recreational use is largely unregulated. If you want to fly it commercially you need to get an exemption request from the FAA and a pilot’s license.
Wispeo is now mobile! Get the easiest way to share videos and photos from your phone in the App Store or from Google Play.


